
When investigating a ClickShare issue, collecting the correct logs is essential for efficient troubleshooting. Depending on the component involved, logs can be obtained from the ClickShare Base Unit, ClickShare Button, ClickShare Desktop App, Extension Pack or Launcher.
ClickShare has different levels of logging. The most commonly used logs are Base Unit logs (both regular and debug) and ClickShare Client logs.
Important: Always enable debug logging before reproducing the issue. Once enabled, recreate the problem so that all relevant events are captured in the logs.
Table of contents
- ClickShare Base Unit logs
- ClickShare Button logs
- ClickShare Desktop App logs
- ClickShare Launcher logs
- ClickShare Extension Pack logs
1. ClickShare Base Unit Logs
Base Unit logs are the primary source of information when troubleshooting ClickShare devices.
Option A: via ClickShare Configurator
When troubleshooting a ClickShare device, you might need to collect debug logs. To ensure that you gather useful debugging logs for effective troubleshooting and sharing with Barco, please follow the instructions mentioned below carefully.
- Log in to the ClickShare Configurator (how-to, see KB2324).
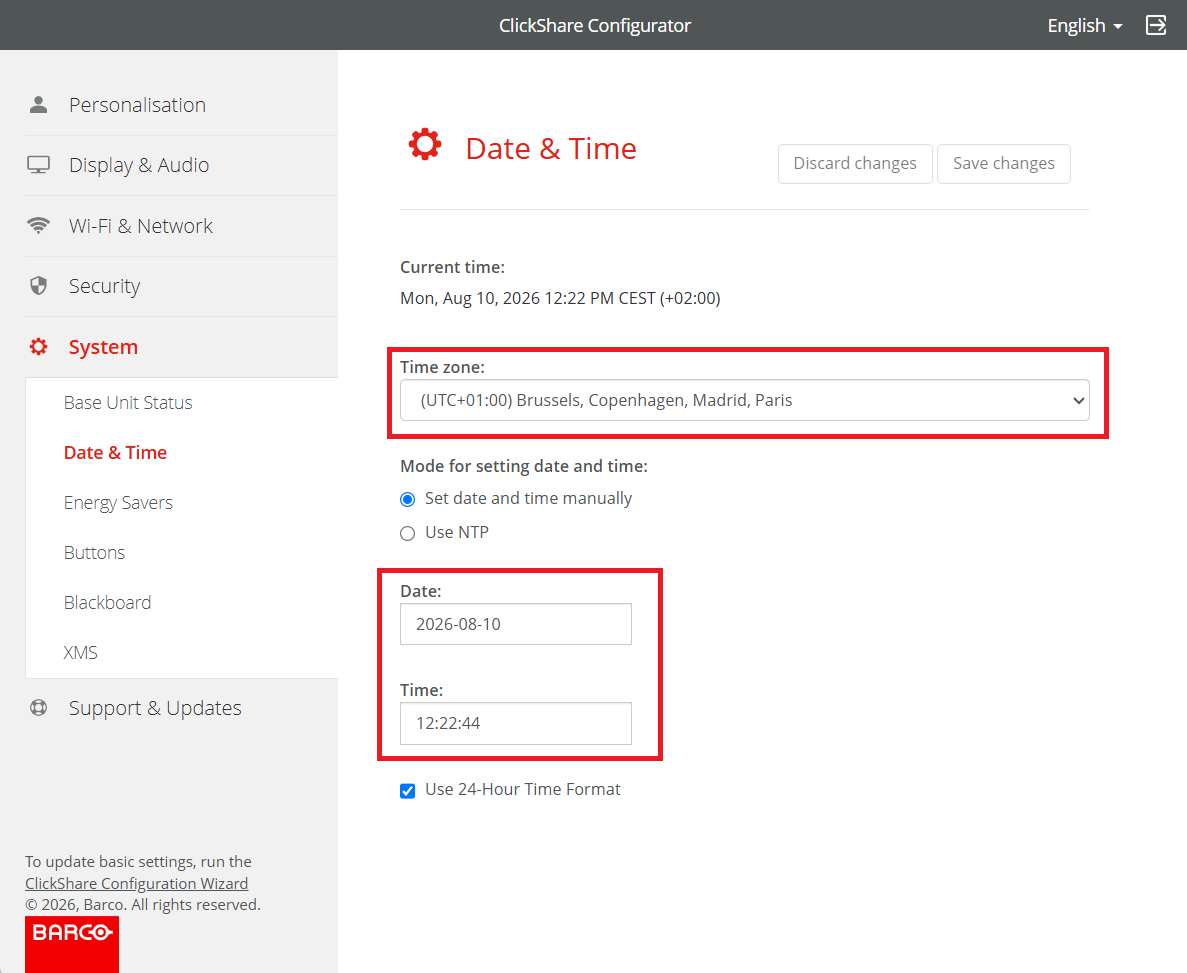
- Navigate to System → Date & Time
- Verify that the Date and Time are correct.
- Adjust them if they are not, including the Time zone.
- Navigate to Support & Updates → Troubleshoot.
- Tick the Enable debug logging checkbox.
Note: Uncheck Enable debug logging if you only want to capture and download regular logs. - Click Clear logs to remove any existing log entries.
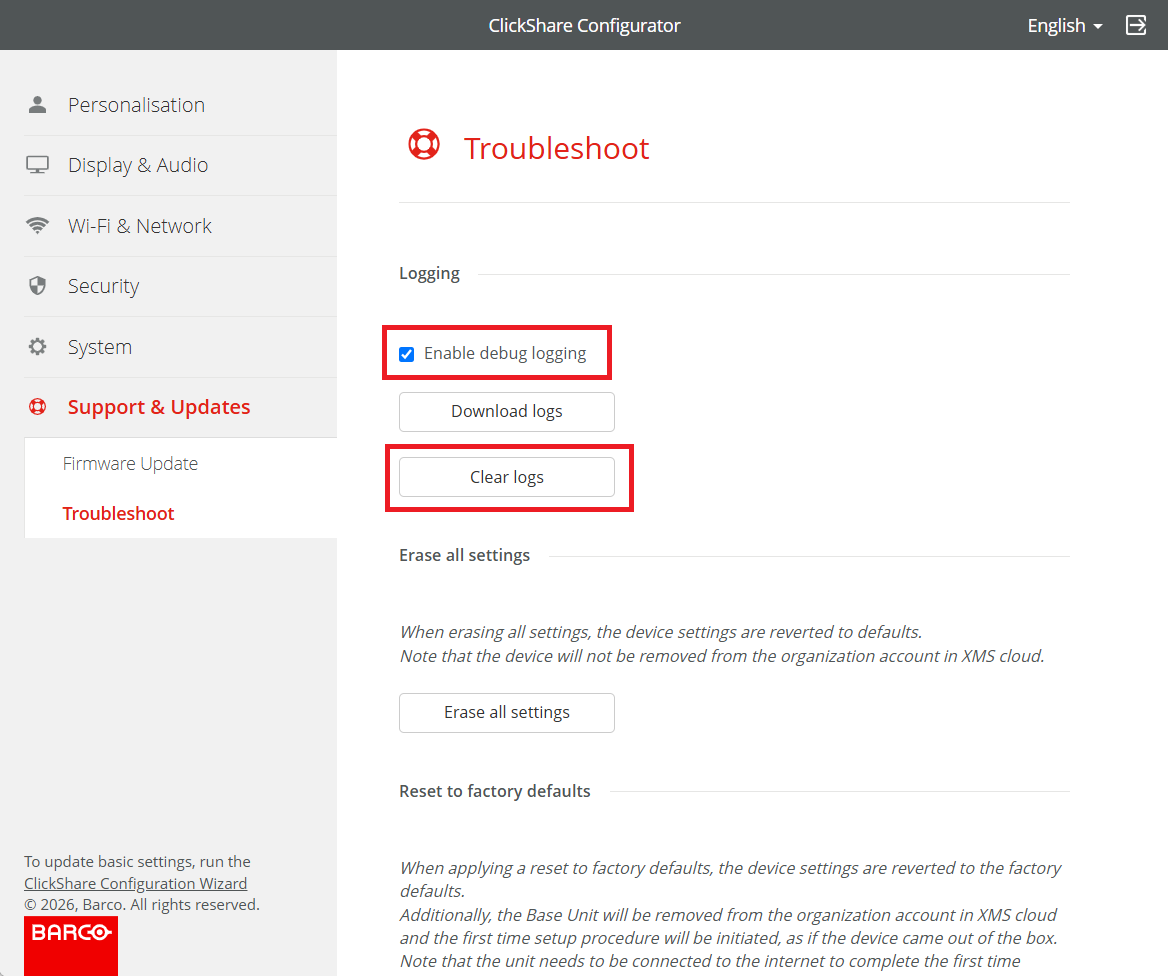
- Tick the Enable debug logging checkbox.
- [Important] Now that debug logging is enabled:
- Recreate the reported issue so it can be recorded in the logs.
- Allow the Base Unit to reboot if required.
- Record the exact time the issue occurs whenever possible.
Accurate timestamps significantly improve the efficiency of the troubleshooting process and help correlate events within the logs.
- As soon as the issue has been reproduced, return to Support & Updates → Troubleshoot and click Download logs.
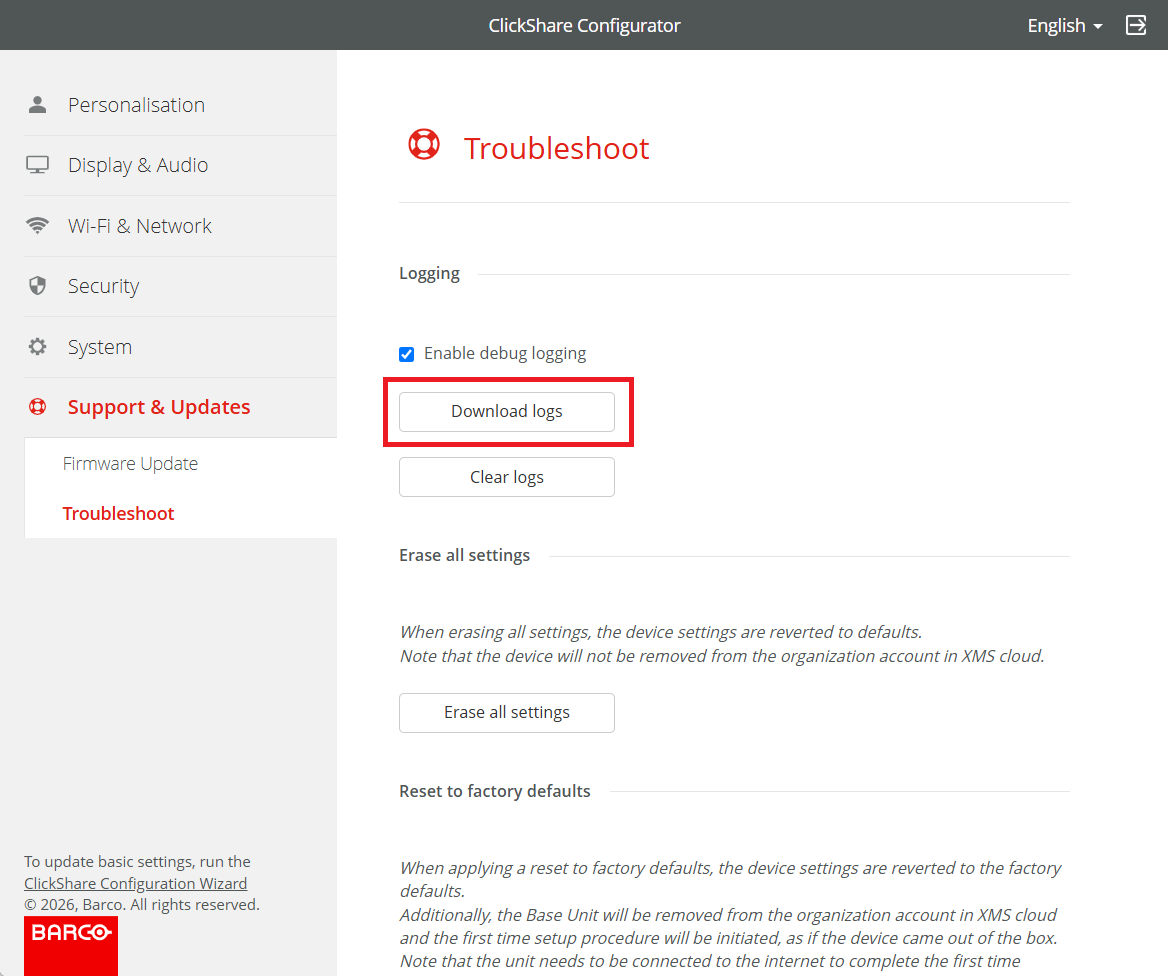
The Base Unit logs will be downloaded to your local computer as a gzipped tarball (
.tar.gz) file. - Submit the log file for review by attaching it to your Barco eSupport case. If possible be sure to include the exact time at which the issue occurred.
Option B: via XMS Cloud
When troubleshooting one or multiple ClickShare Base Units managed through XMS Cloud. Base Unit logs can be downloaded directly from the XMS Cloud:
The downloaded logs will contain either:
- Debug logs, or
- Regular logs
Depending on the logging level configured on the ClickShare Base Unit at the time the logs were collected.
Additional Information
For detailed instructions on downloading ClickShare Base Unit logs through XMS Cloud, click here.
2. ClickShare Button Logs
Button logs are particularly useful for investigating:
- USB connectivity issues
- Network connection problems
-
Button detection and communication
Prerequisites
Before enabling debug logging, ensure the following conditions are met:
- The ClickShare Button is disconnected from the computer.
- The ClickShare Desktop App is completely closed.
Note: Logging mode cannot be activated while the Button is connected or while the ClickShare Desktop App is running.
Enable debug logging
- Connect the ClickShare Button to the laptop while holding the SHIFT key on the keyboard.
If ClickShare Launcher is not installed
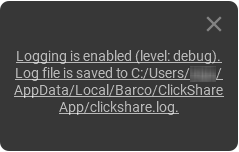
Connect the ClickShare Button to the laptop while holding the SHIFT key on the keyboard and then launch the ClickShare executable on the Button.A confirmation dialog will appear indicating that logging has been enabled.
- Reproduce the reported issue.
- Navigate to the following folder location on your laptop to obtain the log files:
- Windows:
%LOCALAPPDATA%\Barco\ClickShare App\clickshare.log - macOS:
~/Library/Application Support/Barco/ClickShare App/clickshare.log
- Windows:
- Additional capture logs: The following files may also be generated and can assist in troubleshooting capture-related issues.
DLCap.logDXCap.log
Additional information
For detailed instructions on enabling debug logging and collecting ClickShare Button logs, click here.
3. ClickShare Desktop App Logs
ClickShare Desktop App logs are useful for troubleshooting issues related to the ClickShare Desktop App itself. To collect App-specific logs, do NOT use a ClickShare Button during the logging process.
Caution: Before setting the ClickShare Desktop App into debug mode, ensure it is closed, otherwise you will not be able to get the debug logs. Check if the app is still running in the background by clicking the arrow on the right of the taskbar and looking for the ClickShare App circle logo. If it is present, right-click the logo and select Quit.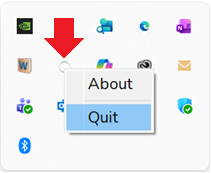
Enable debug logging
To obtain debug logs from the ClickShare Desktop App, please follow the instructions mentioned below on your Windows or macOS.
- Open ClickShare Desktop App while holding the SHIFT key on the keyboard.
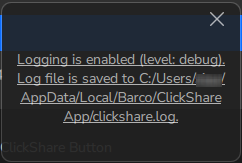
- Reproduce the reported issue.
- Allow the application to restart, crash, or the computer to reboot if required to trigger the issue.
- Open File Explorer and navigate to
%LOCALAPPDATA%\Barco\ClickShare App.
The folder contains all application logs and related files. - Attach the logs (
zip file) to your Barco eSupport case for further analysis.
- Open ClickShare Desktop App while holding the SHIFT key on the keyboard.
- The debug log file will store to the path:
/Users/<username>/Library/Application Support/Barco/ClickShare App/clickshare.log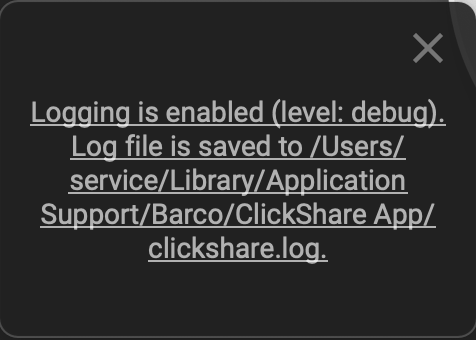
Additional information
For detailed instructions on enabling debug logging and collecting ClickShare Desktop App logs, click here.
ClickShare Launcher Logs
Useful for troubleshooting ClickShare Launcher problems.
Prerequisites
-
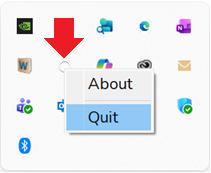
Before enabling logging, ensure that the ClickShare Desktop App is completely closed. Open the ClickShare quick menu from the system tray (Windows) or menu bar (macOS) and select Quit to close the Desktop App.
Enable debug logging
- Open a Command Prompt (Windows) / Terminal Window (macOS) with Administrator privileges.
- Navigate to the root folder:
- Windows:
cd C:\Program Files (x86)\Barco\ClickShare Extension Pack\Launcher - macOS:
cd /Applications/ClickShare\ Launcher.app/Contents/MacOS/
- Windows:
- Enable logging of the launcher:
- Windows:
clicksharelauncher.exe -enablelogging - macOS:
./clicksharelauncher -enablelogging
- Windows:
- Reproduce the reported issue.
- Perform the action that triggers the problem (for example, inserting a ClickShare Button).
- Navigate to the Log location:
- Windows:
%localappdata%\Barco\ClickShare Launcher\service.log - macOS:
~/Library/Application Support/Barco/ClickShare Launcher/service.log
- Windows:
- Collect the generated log files and attach them to your Barco eSupport case for analysis.
Additional information
For detailed instructions on enabling debug logging and collecting ClickShare Launcher logs, click here.
5. ClickShare Extension Pack Logs
Useful for troubleshooting the issues encountered while installing the ClickShare Extension Pack via the command line using msiexec.exe (how-to, see KB2959).
- Open a Command Prompt with Administrator privileges.
- Browse to the directory where the Extension Pack MSI file is stored:
cd <MSI_folder_location> - Run the command:
C:\Windows\system32\msiexec.exe /i ClickShare-Extension-Pack.msi /l*v ilog.txt. - Reproduce the installation issue by performing the installation and allowing it to fail or exhibit the reported behavior.
- After the installation process completes, a log file named
ilog.txtis generated in the current directory. -
Attach
ilog.txtto your Barco eSupport case for analysis.
macOS note
If you’re unsure how to navigate to the ~/Library/Application Support/Barco directory, please browse to /Users/<username>/Library/Application Support/Barco.

