4.12 Connecting an EC-210

Note: The EC-210 requires Event Master Toolset 10.1 or higher to function.
About connecting an EC-210

An EC-210 does not require a dedicated computer or laptop to function. Event Master Toolset is ran locally on the controller.

How to connect
  1. Plug a power cable from the wall socket to the power port (reference 1).
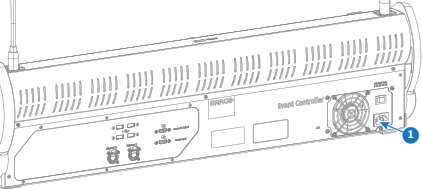
    Image 4–27
  2. Set the power switch (reference 2) in the ‘on’ position.
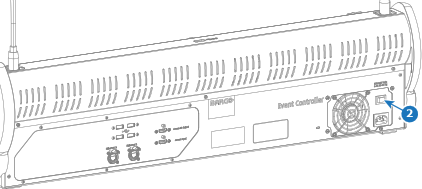
    Image 4–28

    A light bounces back and forth among the ‘Destination’ buttons.

  3. Connect an ethernet cable from the network to the ‘Ethernet 1’ port (reference 3).
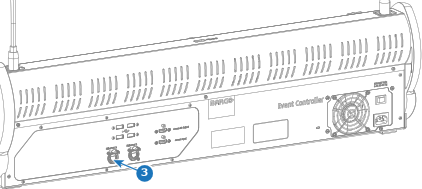
    Image 4–29
  4. Is a backup network connection needed?
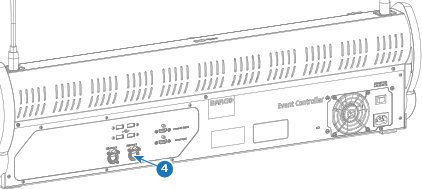
    • If yes, connect a second ethernet cable to the ‘Ethernet 2’ port (reference 4). Go to next step.
    • If no, go to next step.
    Image 4–30
  5. Must an external display be used as additional screen?
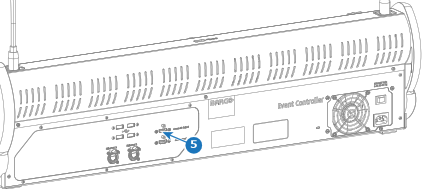
    • If yes, connect the display to the ‘Screen #3 Output’ HDMI port (reference 5). Go to next step.
    • If no, go to next step.
    Image 4–31
  6. Must one of the built-in screens of the EC-210 be used as an extended display for a computer or laptop?
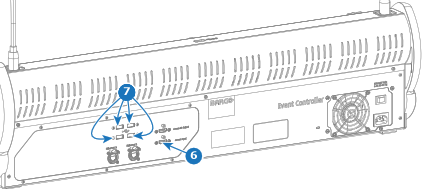
    • If yes with touch functionality, connect the computer or laptop to the ‘Screen Input’ HDMI port (reference 6) and to any free USB-A port (reference 7). Go to next step.
    • If yes without touch functionality, connect the computer or laptop to the ‘Screen Input’ HDMI port (reference 6). Go to next step.
    • If no, go to next step.
    Image 4–32
  7. Connect a keyboard and or mouse to any of the ‘USB-A’ ports of the EC-210 (reference 7). (optional)
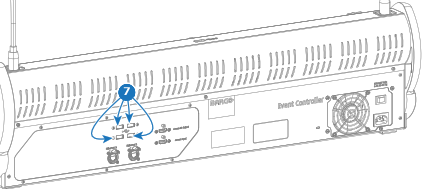
    Image 4–33
  8. Configure the connected network ports using Event Master Toolset. For more information, see “EC-210 communication setup”.
  9. Use the Event Master Toolset software running on the EC-210 to connect to the Encore3 or a simulator of the Encore3. For more information, see “System creation”.