
As a ClickShare administrator, you can connect to the ClickShare Configurator (aka WebUI) of the ClickShare Base Unit in 3 ways, each of which is explained in detail below:
- Connect to the ClickShare Base Unit wired IP (or wireless client)
- Connect to the ClickShare Base Unit internal Wi-Fi
- Direct Ethernet connection between PC and Base Unit (ClickShare admin only)
Note - sharing screen:
If you are looking for information on sharing your screen to the meeting room display, see:
- KB2898 (ClickShare Button), or
- KB2607 (ClickShare Desktop App)
1. Connecting to Base Unit’s Web Configurator point via wired IP (or wireless client)
Use this method when the Base Unit is connected to a network (network‑connected or network-integrated).
- Find the wired IP address of the Base Unit
- Check the meeting room splash screen, or
- Open the ClickShare App and view in the About menu.
- Open the ClickShare Configurator
-
In a supported browser, browse to
<BaseUnit_IP>address and bypass the browser warning (For example in Chrome: Advanced → Proceed).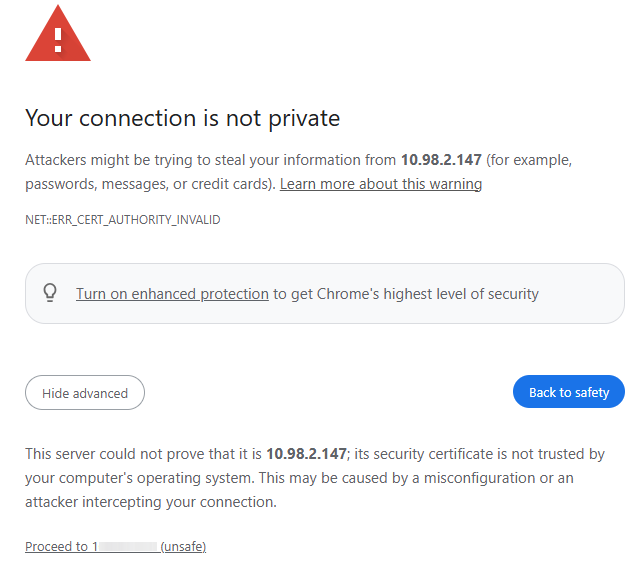
- Click on the IP address shown in the About menu to directly open the ClickShare Configurator on your laptop.
- Depending on the web browser used, the way to bypass the browser warning may vary.
-
- Log in to connect to the ClickShare Configurator
- Enter your login credentials (default: Username: admin and Password: admin), accept the EULA and click Log in.
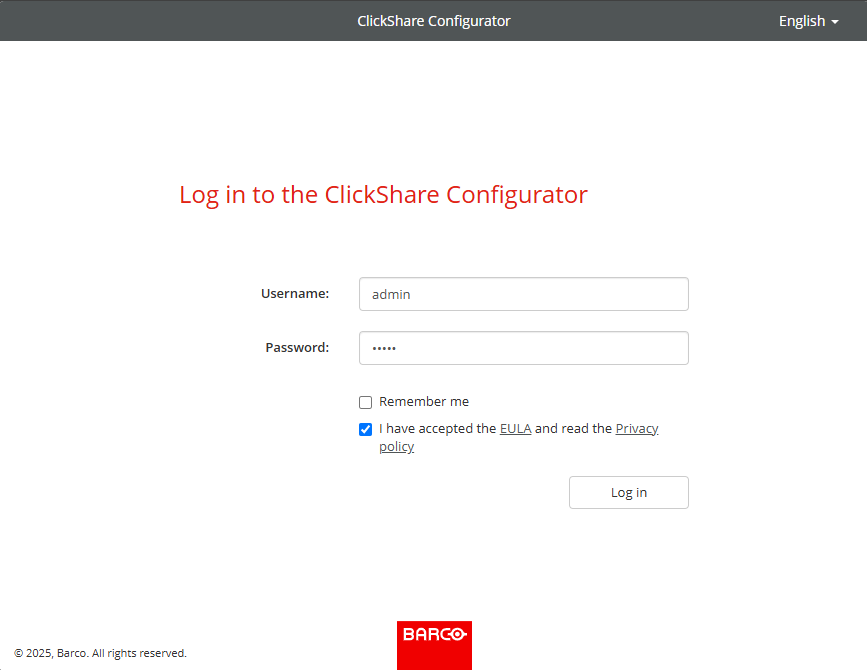
ClickShare Configurator login page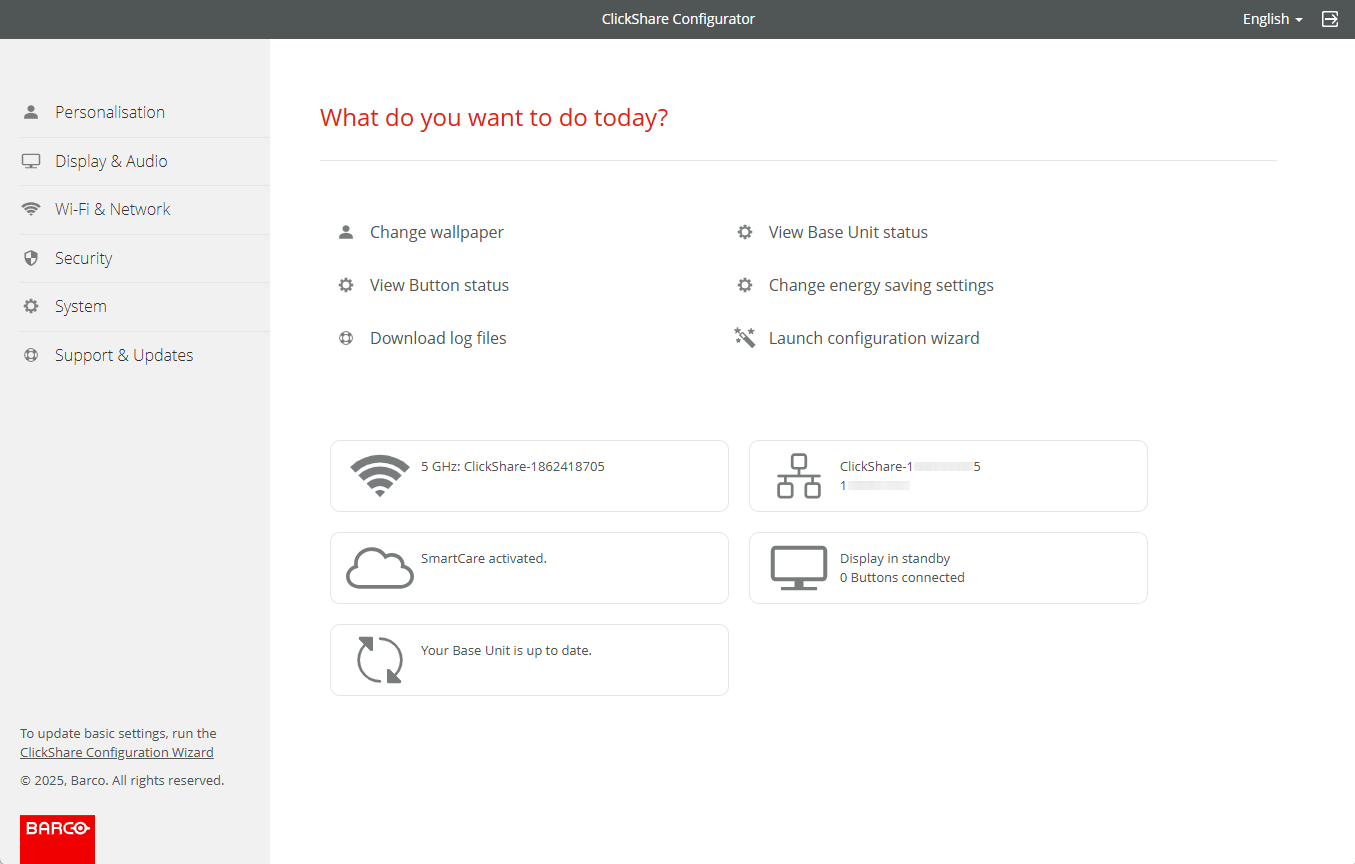
ClickShare Configurator connected
- Enter your login credentials (default: Username: admin and Password: admin), accept the EULA and click Log in.
2. Connecting to Base Unit’s Web Configurator point via Wi-Fi
Use this when the Base Unit is not integrated into the corporate network and is operating in standalone mode on its own internal Wi-Fi.
- Connect to the Base Unit’s SSID
- From your laptop, connect to the Base Unit Wi‑Fi (default SSID:
ClickShare‑<serial base number>; default password:clickshare).
- From your laptop, connect to the Base Unit Wi‑Fi (default SSID:
- Open the ClickShare Configurator
- In a supported browser, browse to 192.168.2.1 or the IP address configured for your Base Unit during setup. Bypass the browser warning (For example in Chrome: Advanced → Proceed).
- Log in to connect to the ClickShare Configurator
- Enter your login credentials (default: Username: admin and Password: admin), accept the EULA and click Log in.
3. Direct Ethernet connection between PC and Base Unit
Use this method when you cannot obtain your Base Unit's IP address (due to DHCP/VLAN issues) and you are unable to connect via the Base Unit’s internal Wi‑Fi SSID.
- Directly connect your laptop to your Base Unit ethernet port using a crossover ethernet cable.
-
Adjust network/Wi‑Fi settings as needed:
- Set the LAN port of your laptop to a fixed IP address 192.168.1.xxx (except 23) with Subnetmask 255.255.255.0.
- Open the ClickShare Configurator
- In a supported browser, browse to http://192.168.1.23. Bypass the browser warning (For example in Chrome: Advanced → Proceed).
- Log in to connect to the ClickShare Configurator
- Enter your login credentials (default: Username: admin and Password: admin), accept the EULA and click Log in.
Troubleshooting - ClickShare Configurator not accessible
- Base Unit's IP address cannot be reached from a laptop on different VLAN or network:
- Configure your laptop to the same network as the Base Unit.
- Use method 2 (internal Wi-Fi/SSID) or method 3 (direct Ethernet).
- Base Unit in Wireless Client mode:
- If your Base Unit (CX-20/-30, C-5/-10 and Bar Core/Pro) is in Wireless Client mode, its internal Wi‑Fi is busy and won’t accept direct SSID connections. No issue with CX-50 Gen1/Gen2.
- Use method 1 (wired IP) or method 3 (direct Ethernet).
- ClickShare Configurator accessibility over Wi-Fi connections is disabled:
- To enable it, go to Wi-Fi & Networks > Wi-Fi Settings and check the checkbox in front of ClickShare Configurator available via Wi-Fi.
- Use method 1 (wired IP) or method 3 (direct Ethernet).
- Browser not supported:
- Supported web browsers such as Google Chrome, Microsoft Edge, Firefox, or Safari.
- Admin login not working or password rejected when accessing the ClickShare Configurator:
- Re‑check the default password and try again. For details and additional troubleshooting, see KB4292.
- Unable to bypass the browser warning Your connection is not private:
Additional resources
-
Accessing ClickShare Configurator settings via XMS Cloud
If your ClickShare Base Unit is managed via XMS Cloud, you can access its configurator settings directly within the XMS Cloud interface. For detailed instructions - click here. -
Video tutorial: Accessing ClickShare Configurator
Contact Clickshare Administrator
If you're an end user and encounter difficulty performing specific actions or troubleshooting tips provided here, please contact your ClickShare admin with details of the issue, including reference to KB5431, for the necessary assistance.
Related Articles
- How to connect to the ClickShare Configurator (WebUI) of Hub Core/Pro?
- What can the ClickShare Configurator be used for?
- How to connect to your ClickShare Base Unit Wi-Fi?
- ClickShare Configurator is not accessible on web-browsers
- ClickShare Configurator for CS-100 and CSE-200 Base Units not opening in the Chrome browser on Windows 11

