About accounts
The final part of the configuration wizard allows for the configuration and creation of the accounts required to use ClickShare as a room system. Completion of the account steps allows the ClickShare system to be used for meetings.
The final part of the configuration wizard allows for the configuration and creation of the accounts required to use ClickShare as a room system. Completion of the account steps allows the ClickShare system to be used for meetings.
The Base Unit must be linked to XMS Cloud before the accounts can be configured. For more information, see “XMS Cloud linking”.
Enter a desired password in the input fields (reference 1) and (reference 2).
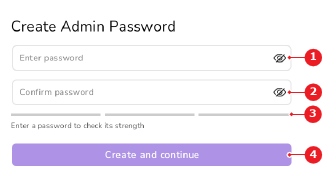
Tap (reference 4, Image 6–13) to create an admin account with the user name ‘admin’ and the entered password as password.
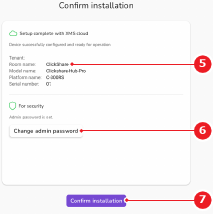
The installation review page is shown.
Must the information be changed?
Enter the current password in the input field (reference 8).
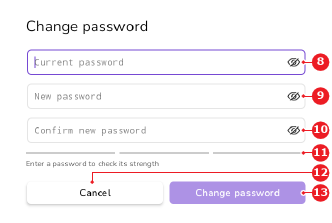
Enter a new password in the input fields (reference 9, Image 6–15) and (reference 10, Image 6–15).
Tap (reference 13) to update the password.
The installation review page is shown.
Tap (reference 7, Image 6–14).
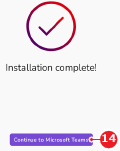
The installation complete page is shown.
Tap (reference 14) to sign in to the meeting room provider.
The Microsoft Teams login page is shown.
Follow the instructions of the room system provider. For more information, see the documentation of the room system provider.
The meeting room home page is shown. The installation is complete. The Button can now be paired to Base Unit. For more information, see “Pairing the Button”.