This is an example on setting up Barco Single sign-on with Microsoft Azure as your Identity Provider (IDP).
To find detailed steps using Barco Management Suite, see [KB12591].
OpenID Connect v1.0
- Navigate to Azure portal and search for the resource
Azure Active Directory.
- On this page, under the
Managetab find and go to App Registrations → New registration.
- Enter any appropriate Name for this application for you to track it by.
- Under
Supported account types, the API access selection may be left to default (Single Tenant). - Under the
Redirect URI, select platform as Web and past the Redirect URI (obtained from the Barco Management Suite) and click on Register. You will now be navigated to the overview page for this new registration.
- Under
Managesection, navigate to Certificates & secrets → New client secret.
- Go to
Overview, under theEssentialssection and copy the Application (Client) ID and save it somewhere.
- Optionally, you can set the claims for this application by going to Token configuration (see Microsoft Docs).
- Complete the form on the Single sign-on settings page in Barco Management Suite:
- For Discovery URI enter "
https://login.microsoftonline.com/{tenant}/.well-known/openid-configuration" where{tenant}is the domain name of Azure AD tenant or it's GUID identifier (see Microsoft Docs). - Optionally, add your own scopes to the Scope field.
- For Client ID, enter the Application ID copied earlier.
- For Secret, enter the client secret Value that was saved earlier.
- Optionally, change the Claims when you've specified your own before.
- Save this configuration by clicking on Save.
- For Discovery URI enter "

SAML v2.0
- Navigate to Azure portal and search for the resource
Azure Active Directory.
- On this page, under the
Managetab find and go to Enterprise applications → New application.
- Click on Create your own application
- Enter any appropriate
Namefor this application for you to track it by - For the query “
What are you looking to do with your application?”, select option – ‘Integrate any other application you don’t find in the gallery (Non-gallery)’ - Click Create.

- Under
Managesection, navigate to Single sign-on and select SAML as single sign-on method.
- You will now be taken to setup page for
Single Sign-on with SAML, from where we will get the metadata file for your application. - Go to the
SAML Signing Certificatesection and copy the App Federation Metadata URL. - Open new tab, paste this URL and navigate. Once the page loads save this file by: (Ctrl + S) → Save or Right click → Save as → Save.

- You will now be taken to setup page for
- Upload the federation metadata file you saved in previous step on Barco Management Suite.
- After the metadata is uploaded successfully, download the Barco Metadata.
- Navigate back to Azure portal tab on the setup Single sign-on page, click on Upload metadata file → Select file → Add.

- After the metadata file uploaded successfully, click on Save.

- Go to the
SAML Signing Certificatesection andEdit. SelectSigning Optionand change it to Sign SAML Response and Assertion and clickSave.
- Go to the
SAML Signing Certificatesection and download Federation Metadata XML.
- Navigate to Management Suite, on the Single Sign-on settings page.
- Update the metadata by changing the file under Your Metadata → Click Upload.
- Once file is uploaded, click Save.
Manage which users can access this SSO configuration
Azure AD allows an option to prevent everyone from signing in to an application by requiring user assignment (see Microsoft Docs).
You can make changes to this by following these steps:
- Go to Enterprise applications, and then search for and select the application you have created for this SSO.
- To give access to all users, turn off user assignment:
- Under Manage, go to Properties.
- Set option Assignment required to No and click Save.

- To give access to specific users, turn on user assignment:
- Under Manage, go to Properties.
- Set option Assignment required to Yes and click Save.

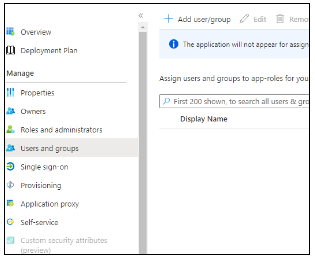
- Now you can assign specific users by going to the Users and groups page and selecting Add user/group (see Microsoft Docs).