Institute authentication setup: introduction
Given that until the authentication is configured for the first time, only a registered Barco Partner and a Barco Super Administrator can log in to the institute's admin UI and start the configuration of it.
For the purpose of this article, we consider that the authentication setup is done by a user with Barco Partner rights and managing rights to the institute.
There are two authentication services available:
Both services are discussed individually as they are not dependent on each other.
E-mail/password authentication
This authentication service is based on users registering to the system with a valid E-mail address and a password of their choice.
Once this service is activated the system can be configured in different ways:
- Open for registration disabled:
Users cannot create their own account and can only sign in with an account that is created by an institute manager, a Barco Partner with manager rights in the institute or by a Barco Super Administrator - Open for registration enabled:
Users can create their own account- with or without two-factor authentication
- with of without approval from a system administrator (manager, Barco Partner with manager rights)
- with or without E-mail verification
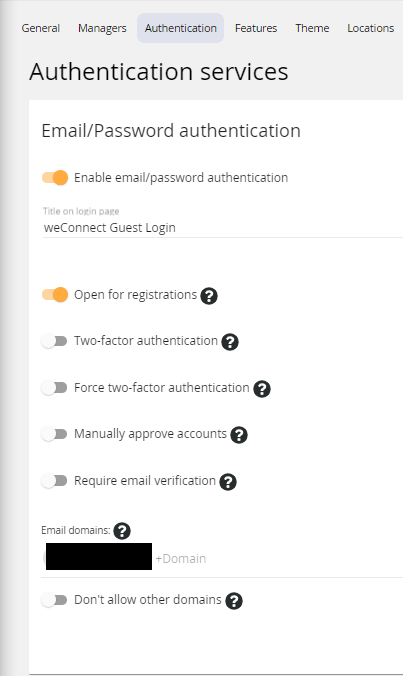
The first step required to make E-mail/password authentication available is to enable it in the Authentication section in the institute admin UI.
Once enabled, the following options appear.
 |
|
-
From weConnect version v2.8.3 onwards an institute manager can reset the password for manually created accounts. Go to the Users section of the admin UI, select a user, go to Login settings and press Send password reset E-mail (see screenshot below). The user will receive an E-mail with instructions and a link to set a new password.

Single Sign On (SSO) authentication
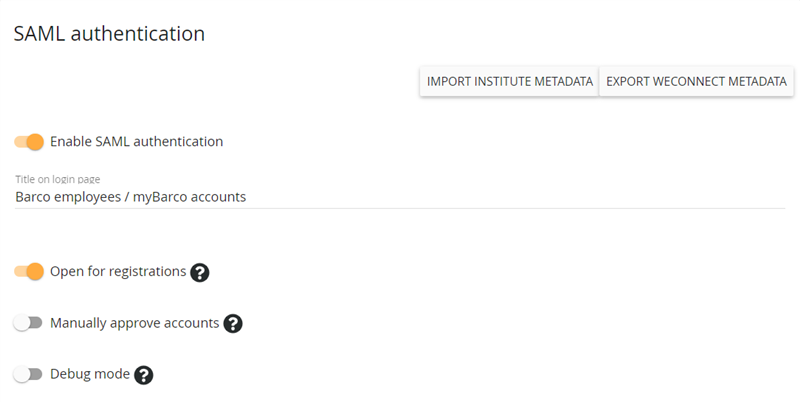
For this authentication service, we refer to a separate document with specific information. Below is an example of an Active Directory Federation Services (ADFS) integration. The integration can be automated by using the buttons Import institute metadata and Export institute metadata in this section. This allows common settings and certificates to be exchanged between the systems.
Enable Debug mode to get meaningful information while testing SSO integration, this can help to find the correct settings to make the integration work as intended. Do not forget to disable debug mode after finishing the integration as users would also see these debug messages.
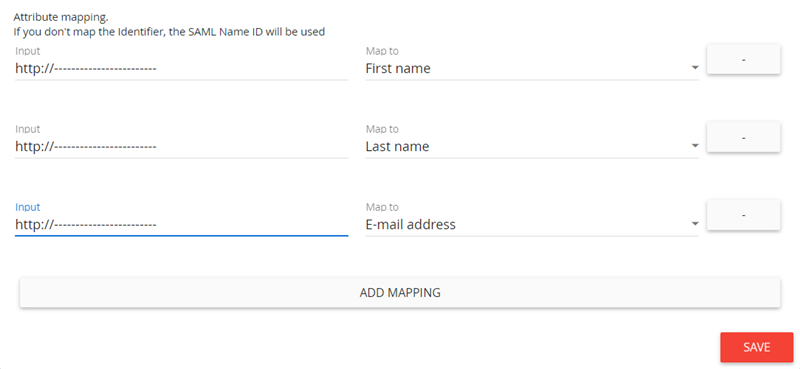
For proper use of the system, we need at least first name and last name mapped to our internal attributes. For future improvements, we suggest mapping the user’s E-mail address as well. Other attributes which are part of the authentication exchange can be used to create different user groups. For more information, see the Usergroups section in the admin UI.


