
You can change the ClickShare wallpaper by two methods described below:
Method 1. Changing wallpaper using ClickShare Configurator
- Login to the ClickShare Configurator of your ClickShare device (how to: see KB2324).
- Go to Personalisation > Wallpaper.
-
Ensure Show the wallpaper when no one is sharing their screen is enabled.
- Choose one of the default backgrounds provided by Barco by clicking on their tiles or upload a custom image by clicking on the tile with Choose image.
- Click Save Changes to display the selected wallpaper on the display connected to your ClickShare device.C-series, CX-series, Bar Core/Pro
 CS(E)-series
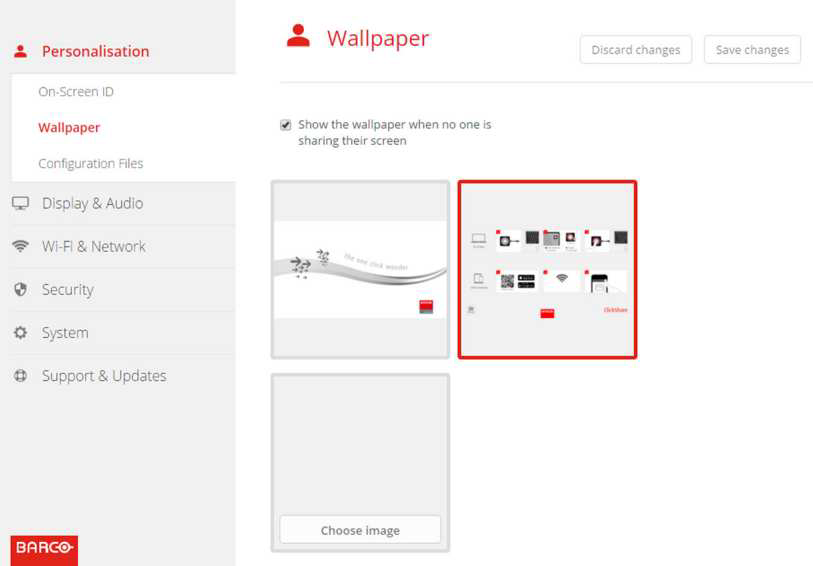
Method 2. Changing wallpaper using XMS Cloud
- Login to your XMS Cloud account (how-to, see KB2534) and select the organisation where your ClickShare device is located.
- Open the Manage Baseunit page of your ClickShare device.
- In the Configuration menu, navigate to Personalisation > Wallpaper.
-
Ensure Show the wallpaper when no one is sharing their screen is enabled.
- Hover over the wallpaper thumbnail and click Change Wallpaper.
- Select a wallpaper and click Apply Wallpaper.
- Click Apply Changes to display the selected wallpaper on the display connected to your ClickShare device.
Additional information
Supported file formats
- C-series, CX-series, Bar Core/Pro: JPEG, PNG
- CS(E)-series: JPEG, PNG, BMP, TIFF
- CS(C)-1 and CSM-1: BMP, TIFF
Wallpaper requirements
| Device | Maximum file size | Maximum resolution (in pixels) |
|---|---|---|
| C-series, CX-series, Bar Core/Pro | 10 MiB | 4096 x 2160 |
| CSE-800 | 10 MiB | 8196 x 2160 |
| CSE-200+ | 10 MiB | 4096 x 2160 |
| CS-100 / CSE-200 | 2.5 MiB | 1920 x 1200 |
Note: For best image quality make sure to always use the image of the size of the native resolution of the display.
Video tutorial
Watch the video tutorial demonstrating how to change the wallpaper using both the ClickShare Configurator and XMS Cloud.
Installation manual
For details on downloading, enabling/disabling, uploading, or removing wallpapers, refer to the installation manual for your ClickShare Base Unit. To view and download the installation manual, see (how to: see KB9362).

