
On Apple Silicon (M-series) Macs, Rosetta 2 (available from macOS Big Sur 11.2 and higher) enables the installation and use of the ClickShare Desktop App.
Both content sharing and wireless conferencing work with the ClickShare Button.
Note: Connecting a ClickShare Button does not trigger the installation of Rosetta 2. If Rosetta is not already installed, the installation prompt appears only when the ClickShare Desktop App is launched for the first time.
⚠️ Note – End of Rosetta Support
On Apple Silicon (M-series) Mac devices, the current ClickShare Desktop App relies on Apple’s Rosetta 2 translation technology. Apple has announced that macOS 27 (Golden Gate) will be the final release providing full Rosetta 2 support, with Rosetta 2 no longer available for general use beginning with macOS 28.
Barco is working on a native ARM version of the ClickShare App to ensure continued support. For details, see: Apple end of Rosetta support and impact on the ClickShare Desktop App.
Prerequisites
To use ClickShare on an Apple (M-series) Mac, ensure the following requirements are met:
- Mac running macOS Big Sur 11.2 or later
- User logged in with administrator privileges, or an administrator available to approve elevation requests
- Active internet connection to download Rosetta 2
- ClickShare Button and/or ClickShare Desktop App
Using ClickShare Button Only (No App Installation)
-
Connect the ClickShare Button
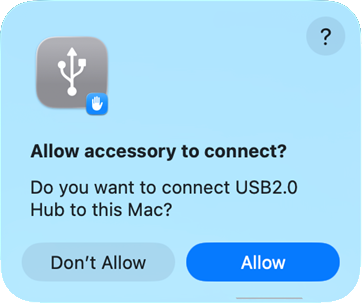
- Plug the Button into your MacBook.
- A USB access popup will appear. Click Allow.
-
Access the ClickShare Drive
- The ClickShare CD-ROM icon appears on your desktop.
- Open it to launch the ClickShare screen.
-
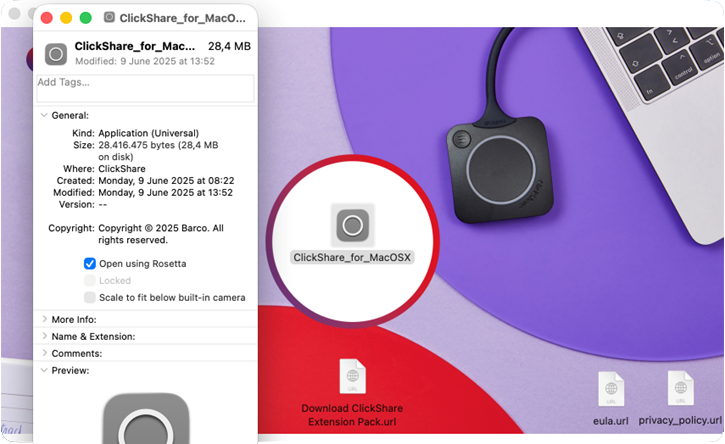
Enable Rosetta for the App
- Right-click
ClickShare_for_MacOSXand select Get Info. - Check Open using Rosetta.
- Right-click
-
Install Rosetta 2 (if prompted)
- Follow the on-screen instructions to install Rosetta.
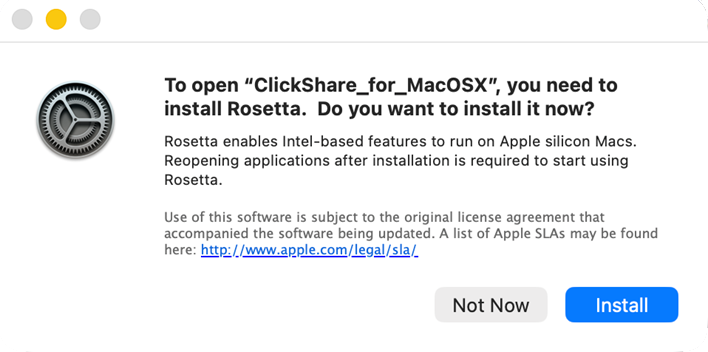
- Wait for installation to complete.
- Follow the on-screen instructions to install Rosetta.
-
Launch the ClickShare App
- Start the
ClickShare_for_MacOSXapplication. - A popup will request screen and audio recording permissions.
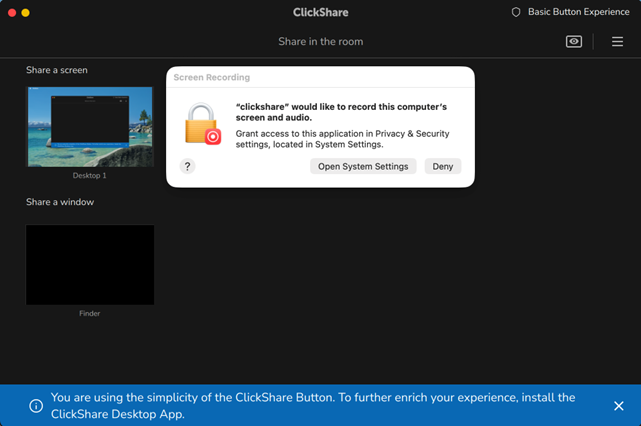
- Click Open System Settings, enable the slider, and close settings.
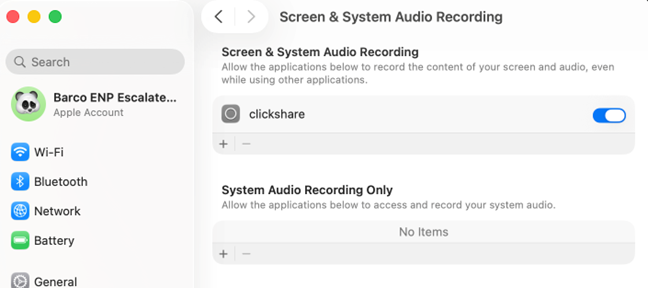
- Another popup will request direct access to screen/audio—click Allow.
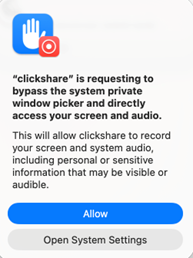
- Start the
You can now share your Mac screen using the ClickShare Button.
Using the installed ClickShare Desktop App
-
Download the App
- Visit https://www.barco.com/support/software/r3307118 and download the PKG file for macOS.
-
Install the App
- Open the PKG file and follow the installation steps (how-to, see KB13167).
- Launch the ClickShare Desktop App from the Applications folder.
-
Install Rosetta 2 (if prompted)
- If a popup appears, proceed with Rosetta installation.
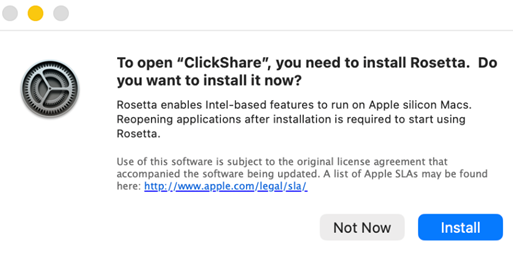
- Wait for installation to complete.
- If a popup appears, proceed with Rosetta installation.
-
Launch the App Again
- After Rosetta is installed, restart the ClickShare Desktop App.
-
Grant Required Permissions
- Allow any popups that appear.
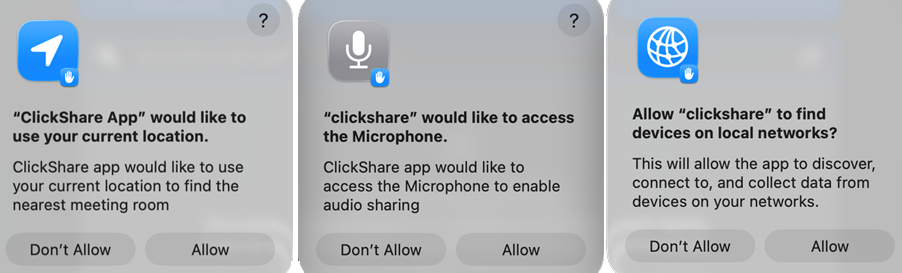
- Enable ClickShare PresentSense when prompted to allow microphone access for ultrasound signal detection.
- Click Allow and follow any additional system prompts to grant microphone access.
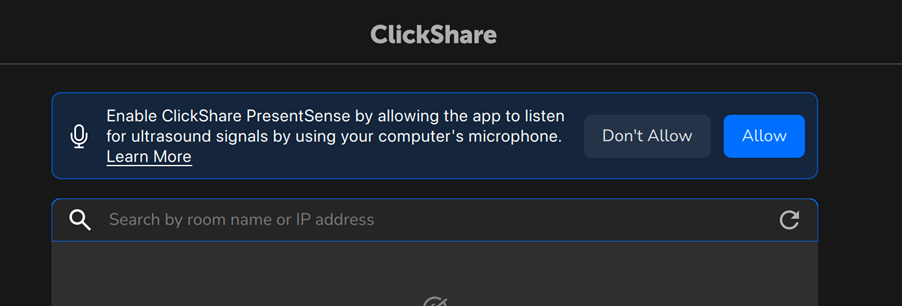
- Allow any popups that appear.
Troubleshooting
Rosetta 2 does not install
macOS typically installs Rosetta 2 automatically when an Intel-based application requires it. If the installation fails or does not start automatically, install Rosetta 2 manually.
Open Terminal and run: softwareupdate --install-rosetta
ClickShare Desktop App does not launch after installation
If the ClickShare Desktop App refuses to open after you have set up Rosetta 2, follow these targeted configuration steps to resolve the issue:
-
Verify Rosetta 2 configuration
The ClickShare Desktop App currently relies on Rosetta 2 to run on Apple Silicon.
- Open the Applications folder and locate the ClickShare Desktop App.
- Right-click (or Control-click) the application icon and select Get Info.
- Verify that Open using Rosetta is enabled.
If this option is missing or unselected, macOS may fail to initialize the software correctly.
-
Configure system permissions
The ClickShare Desktop App requires deeper integration with macOS to share your screen and stream audio. If these permissions were bypassed during the initial setup, the app may crash or fail to launch.
- Open System Settings → Privacy & Security.
- Select Screen Recording and verify that ClickShare is enabled.
- Select Accessibility and verify that ClickShare has the required permissions.
- Relaunch the application.
-
Perform a Clean Reinstallation
Corrupted installation files or conflicting software versions from previous attempts can block the application from opening:
- Remove the ClickShare Desktop App from the Applications folder.
- Optionally use a cleanup utility such as AppCleaner to completely remove it from your system along with any associated files.
- Download and install the latest version of the ClickShare Desktop App.
- Launch the application and complete the Rosetta 2 installation and permission prompts again.
-
ClickShare Launcher does not start automatically,
If the ClickShare launcher does not start automatically when the ClickShare Button is connected, see KB15420 for troubleshooting tips and additional information.

